Monday 9 November 2015

Diwali Chocolates ...Simple and delish flavours..

Hello everyone!!!

Firstly, I would like to wish one and all a very happy and a safe Diwali... Enjoy this diwali with your near and dear one's with my previous post Chocolate covered Oreo's . Recipe  Click Here .
Received an overwhelming response on social media. A lot of groups, which I am a member of, appreciated and thanked me for this innovative idea for this diwali, as, many people are sort of bored of sweets/mithai's and dry fruits.. Thank you for making it such a hit. My page- Empty Vessels Make Noise click here to subscribe on Facebook, was poured with lovely messages and thank you's.
I want to thank each and every person from the bottom of my heart for the lovely words and super likes :) Inspires me to do more for you guys. So, as promised, I am posting the chocolates which I made for an order , Over 400 in number.
Making these is definitely time consuming and requires your complete attention. As its not just about the chocolate, it about the technique, the materials which go in making these- to start off with, the moulds, chocolate itself, flavours, fruits, nuts, etc, then comes the refrigeration, storage, the packaging materials, the boxes to be packed- this time the boxes were supplied by Jaishree Ostwal, who deals with Ektra Superware- Pure Melamine Tableware, the decorations required and finally the delivery.

So here is what I did. Simple flavours like Pleasing Fruit and Nut, Crunchy Roasted Almonds, Sinful Crackle made of Rise Crispies and Butter Scotch, Chilling Peppermint, Mischief  Dark and White hazelnut truffle's. Do check it out and comment your views on them.


 Pleasing Fruit And Nut


 Crunchy Roasted Almonds


 Crunchy Roasted Almonds 2


Sinful Butter-Scotch With Rice Crispies


Sinful Butter-Scotch With Rice Crispies 2


Sinful Butter-Scotch With Rice Crispies


Mischief Dark And White Hazelnut Truffle's


Chilling Peppermint


Packed in attractive Ektra Superware- Pure Melamine Tableware- By Jaishree Ostwal


This was my diwali this year.. Would love to know how was yours. 
Do leave me a comment!!


Friday 6 November 2015

Chocolate Covered Oreo's


Diwali is the most busiest festival for us. It literally is new years, hence the entire house gets a brushing, the furniture,crockery,linens, etc. get a good scrub. There is no place which is left untouched. Every nook and corner is made to sparkle like crackers..And along with this, I was busy with a huge diwali order of over 400 chocolates of various flavours. I will put up some pictures in my next post along with some diwali goodies like Shakarpara's, Namkeenpara (Khaja), Mathri's and a few mixture's/chivda's, especially made by my mother. Sometimes I am left amused as to where does she get all this energy to clean up the entire house for diwali, make her crockery shine, cook everyday meals, helping me with my order and prepares diwali specials along with checking and replying to her whatsapp and facebook accounts....phewww... She is a powerhouse of super energy, I just wished I had at-least 50% of the energy she has...

This is also why I was unable to post anything for a few weeks. And, it feels really good when some of your followers ask you about your next post and when would I publish it!

So here it is guys....Chocolate covered Oreo's


So I decided to do Chocolate Covered Oreo's. Extremely simple to make and these make great diwali gifts as well. Nobody will no until they have a bite to realise that there's an Oreo in it. And these cuties taste divine.


This is by fare the most simple yet super attractive chocolate covered cookie to make. Requires just 2 ingredients.


Ingredients:
  • Dark Chocolate Compound : 500 Gms
  • Oreo Cookies: 1 Pack (Large)


Method: 

Break the chocolate in small pieces and put it in a microwave safe bowl and melt your chocolate on high power, at a pulse of 50 seconds burst . If you do not have a MW, you can use the Bain Marie (double boiler) method to melt your chocolate.

Once the first 50 seconds are done, take it out give it a good whisk. If you still see lumps , go for another 50 seconds pulse. Give it a good mix now.

Your chocolate should now be of free flowing consistency.

Here I used a silicon mould, as this will be the easiest to work with.

Follow the step by step picture tutorial for easy understanding.

Take some melted chocolate and spoon some in the clean mould.


Tap it on the surface to spread out evenly and remove any air bubbles.


Now let this cool for about a minute.

Now place your favourite Oreo Cookie on the chocolate.


Fill the mould with more chocolate, until it covers the cookie completely.


Once you fill all the cavities, tap the mould on the desk / kitchen counter to remove the air bubbles and make an even surface.


After about a minute, you can place the mould in the refrigerator for about 5 minutes.

Remove it from the fridge and de-mould as shown.


Now you can decorate your chocolates as you desire.


I even made a coloured white chocolate cookie. You can make any flavours, colour's you wish.


These can be nicely packed in beautiful cases and would make a nice diwali present.


A Few Tips

  • If you want you can use one single side of the cookie to make smaller chocolates.
  • Never over heat your chocolate, as it looses its sheen, might get burnt and the final product might not taste good.
  • I prefer white chocolate Oreo's as they taste super yummy.
  • You can also use milk chocolate instead of dark.
  • I have used melted cooled chocolate to decorate my chocolates. Just pour some in a ziplock bag, snip off a corner and start piping.
  • If you cannot source good boxes , you can use transparent sheets and either do individual gifts or pack four in one and tie a nice ribbon to make it more appealing.


Do try these and leave me a comment!!

Happy Diwali everyone!!!

Saturday 3 October 2015

Whole Wheat Quesadilla - The Easy Indian Way!!


When I get super bored with my regular meals and I crave for something chatpata and I see extra chapati's in the kitchen, only one thing comes to my head- Quesadilla...!!

These are so simple and easy to make and are ready in no time.

What are Quesadillas?

Pronunciation: key-suh-dee-uh

These are made of whole wheat flour or corn meal (usually called Tortillas, pronunciation: twar-tee-uhfilled with a savoury mixture, vegetables, cooked often on a griddle. The origin of the quesadilla was colonial Mexico. The quesadilla as a food has changed and evolved over many years as people experimented with different variations of it. The crispier versions are used for making Tacos, nachos, burittos, etc.

So when I eat at restaurants, I have this habit of checking every part of my meal for looks, flavours, ingredients, the degree the elements are cooked etc..
So when I had my first quesadilla, I did the above.. Very soon to find out how simple yet classic a dish this is. Also tried all the accompaniments, individually and all together to know which tastes better.

The verdict- Quesadillas combined with Salsa, Guacamole and Sour Cream is super flavourful, packed with crunchy vegetable and hot and sour flavours, tickling your taste buds to definitely have more.
So here's my take on quick and easy-to-make quesadilla....In no time will members be in appraise of this dish. But yes, you must make this fresh and serve hot to get the best results.


Ingredients

  • Wheat tortilla/Roti - 2
  • Bell Peppers- Red/Green/Yellow -1 Each
  • Onions- 2 Medium Sized
  • Corn Kernels - 1 Small Cup  
  • Baby Corn - 5 No.s, Slit Lengthwise
  • Tomatoes - 1 Large
  • Cottage Cheese/Paneer- 100 Gms
  • Salt- As per taste
  • Tomato Ketchup- 4-5 Tbsp
  • Chilli Sauce- 2 Tsp or Hot Momo dip- click here(which I prepared for momos)
  • Mozzarella Cheese - 1 Cup Grated
  • Oil- 2-3 Tbsp
  • Mayonnaise - 2 Tsp (Optional)


Method

Take a non-stick pan and add oil and let this heat up.

Once the oil is hot, add the onions, after about a minute add the corn kernels/baby corn, tomatoes and stir for another minute.

Now add all the colourful bell peppers(Simla mirch/capsicum) .

Add salt, tomato ketchup and chilli sauce/hot momo dip(click here) and sauté for a few minutes, till all the ketchup is absorbed by the veggies (You do not want a soggy quesadillas). Take this filling off the flame.

Now take a non-stick pan. You can use your non-stick dosa tawa.

Smear oil on the griddle and let this heat up. Take your tortilla, in this recipe, I used the left over roti's from my kitchen. They work wonders, as this will turn super crunchy in a bit with a burst of flavours from the filling.

Just heat the chapati on the one side for few seconds and turn it over.

You may add mayonnaise for that extra flavour on the base of the chapati.


Now take the filling and spread it evenly on the roti.


Add the grated mozzarella cheese on top and put another roti on this and take a spatula and press evenly so that the cheese seals both the roti's and holds the filling.


Now carefully flip this sandwich and let this grill evenly till it turns crispy on the other side as well.


Take this off the flame. Cut and serve with salsa, guacamole and sour cream.


A Few Tips:
  • Of-course you can use corn tortilla or apf tortillas. I just think, that since it takes a lot of efforts to make chapatis, why not make good use of it. The Mexican way.
  • You can go crazy with the veggies and use any you like. Eg: Olives, jalapeños, zuccini, courgettes, rajma etc . But please do not use carrots, beans, cauliflower. They don't go well with this dish.
  • I make my salsa at home, which I refrigerate and use as per my requirement. So I added a couple of teaspoons to enhance the flavour. I will make a separate post on my salsa recipe as well.
  • I also added a couple of spoons of my hot momo dip- click here for recipe. Since I made it extra spicy, I ended up adding more tomatoes and now left with a jar of this dip. Hence I refrigerated this as well. Try and pair it with recipes which require tomatoes and chillies combo. The recipe for my hot momos dip/chutney has already been featured,  on how to make momos at home . 
  • Cheese acts as a binding agent so I added loads of it. If you don't not wish to use this, you can eliminate this. But make sure your gravy is cooked until its lost all its moisture and is almost dry.
  • If you do not get sour cream or guacamole where you live. You can serve this as it is. 


Do try this and leave me a comment!!

Saturday 12 September 2015

Tawa Paneer Tikka With Assorted Grilled Vegetables


Don't have a grill, oven??? Love panner tikkas with crispy grilled vegetables??
Here an easy way to make them on your very own Tawa (griddle) at home, on the gas stove! Doesn't it sound exciting and easy..Now you can make paneer tikka's any time at home at your convenience. With such simple ingredients and veggies you can enjoy these grilled,smoky and flavourful tikka's any time.


Ingredients:


  • Paneer/Cottage Cheese- 250 Gms 
  • Bell peppers -  Green, Yellow and Red - 1 each
  • Tomato- 2 Large 
  • Onions- 2 Large 
  • Cauliflower (optional)
  • Broccoli (optional)
  • Baby Potatoes (optional)
  • Mushrooms (optional)
  • Corn Cob (optional)


For the Marinade:


  • Thick or Hung Yoghurt/Curd/Dahi - 250 Gms , about 2 cups 
  • Ginger -Garlic paste- 1 Tbsp
  • Carom Seeds/Ajwain- 1 Tsp  
  • Turmeric Powder/Haldi- ½ Tsp
  • Black Pepper Powder/Kali Mirch Powder- ½ Tsp 
  • Cumin Seeds Powder/Jeera Powder- 1 Tsp
  • Coriander Powder/Dhania Powder- 1 Tsp
  • Chaat Masala- 1 Tsp
  • Garam Masala Powder or Tandoori Masala- 1 Tsp 
  • Dry Mango Powder/Amchur Powder- 1.5 Tsp
  • Kashmiri Red Chili Powder - 2 Tsp 
  • Lime Juice- 1 Tsp 
  • Regular Salt or Rock Salt- ¾ Tsp or  add as required 
  • Oil - 2 to 3 Tbsp or as required for brushing


Method

Preparing the veggies and paneer:


Slice the paneer into half inch squares or cubes.

Dice the bell peppers/capsicum,tomatoes(remove the seeds from the tomatoes) into squares.

Halve the onions and separate each layer one by one.

Keep the veggies and paneer aside.


Preparation of the marinade:

In a large bowl, whisk the thick yoghurt till smooth.

Add all the spices,lime juice and salt, except oil.

Stir and mix well. Taste the marinade and add salt it required.

Add the diced vegetables (onion, tomato and capsicum) along with paneer slices to the marinade and toss them with your hands, mix gently , so that the marinade coats the paneer and veggies evenly.

Cover the bowl and keep the marinade until you use it.

Brush 1 tablespoon oil on a tawa or a griddle.

Skewer the paneer, veggies and grill them until the edges brown.

You can brush them with extra marinade on the tawa and also brush them with oil so they dont stick at the bottom and turn golden brown.


Each side starts to get browned, gently lift and turn over. the paneer cubes get grilled faster than the veggies.

Sprinkle some chaat masala & lemon juice on the paneer tikka.

Serve the paneer tikka's with the crunchy veteables hot with mint yoghurt chutney and vinaigrette onion salad .


A Few Tips


  • You can use a variety of vegetables like Cauliflower,Broccoli,Baby Potatoes,Mushrooms,Corn Cob, Zuccini etc.
  • Use a non stick pan or a well greased tawa or griddle. Tawas on which dosas are prepared also work well.
  • If your using homemade yoghurt, then ensure that the curd is thick. there shouldn't be much whey in it. 
  • In case there is whey left, then strain the yoghurt through a cheesecloth for a few hours until the whey drains out, this is your thick yoghurt.
  • You can use a Tandoor to grill your veggies, just dip a small waste cloth in petrol/kerosene and keep it in the tandoor surrounded with charcoal and carefully light the cloth and after a few minutes start fanning to create fire. This authentic grill gives an amazing smoky flavour to any tikka, kebabs etc.
  • You can char grill to brown the veggies more but remember to take off the paneer cubes as soon as they brown. If you want you can fry the paneer cubes first and then the vegetables.
  • I used wooden skewers, you can make mini tikka's by using toothpicks, if you so not find long wooden skewers.
  • You can also use aluminium skewers which are normally used in charcoal grills.
  • We recently had a charcoal grill session, where we used a grill which my late grandmother used to use in the earlier days. This is a priced possession for us,passed on for generations and finally we got to use it too..Grandma is surely going to be very happy..
  • We even roasted Khichia's (Rajasthani version of thick papad), regular papad, lehsun(garlic) papad and many more..These were divine and tasted so good.


Do try this and leave me a comment!!

Friday 4 September 2015

Momos with Hot Spicy Dip


Momo originated in Tibet, but have a strong presence in the fast food menus of Nepal, Darjeeling, Sikkim, Northeast and North India. Every office complex, housing area and market place has a vendor selling momos. Sikkimese people from the state of Sikkim and the Ladakhi people from North Western India have Momos as a part of their local ethnic cuisine.

What's a MOMO?

Traditionally, momo is prepared with ground/minced meat filling, but over the past several years, this has changed and the fillings have become more elaborate. These days, momo is prepared with virtually any combination of ground meat, vegetables, tofu, paneer cheese, soft chhurpi (local cheese) and vegetable and meat combinations

Varieties in Momo

Basically, there are three types of momos- steamed, fried and pan-fried. Momo is usually served with a dipping sauce (locally called chutney/achhar), normally made with tomato as the base ingredient. In Nepal, soup momo is a dish with steamed momo immersed in a meat broth.
Pan-fried momo is also known as kothey momo. Steamed momo served in hot sauce is called C-momo.
These days momos have become very popular among college students in and around the country. Every city has restaurants, street vendors selling momos as they are are extremely affordable and pocket friendly and 1 portion for 1 person is super filling. So restaurateurs are getting super creative and going crazy churning out about 200 plates of momos per day as an example. I recently got to know about a place which sells Tandoori Momos. Can you beat this? Haha ..Its amazing how this little Tibetan delicacy has gained popularity.

I have just prepared simple momos to start of with. Later we shall get creative and use them in soups, baked dishes, tandoori style etc.

Ingredients


For the Filling


  • Grated Cabbage - 1 medium sized
  • Finely grated Carrot - 1 medium sized
  • Grated Ginger - 2 inch piece(1 Tbsp)
  • Salt - as per taste
  • Oil - 2 Tsp 


For the Dough


  • Maida(plain flour) - 1 cup
  • Salt - as per taste
  • Water- To knead a firm dough
  • Oil - 1 Tsp for the dough

Method

For the Filling: 

Add the cabbage and carrot to the mixer and blend till it is finely chopped into tiny bits.

Take this mix and squeeze out all the water by pressing the cabbage- carrot mix between your palms, until no water is left.

Add 2 teaspoons of oil to a wide pan. Add giner paste or grated ginger, let it cook for a about a minute and then add the cabbage- carrot mix and  cook until the mixture looks dry . Add salt and give it a good mix. You do not have to cook this for too long, the crunch should remain in the cabbage.

Turn of the flame and leave this mixture to cool.


Transfer to an airtight container if using later.

For the Dough:

Knead a firm dough from the plain flour by adding some salt and room temp water.

Once you knead it well, pour a teaspoon of oil and knead this for 2-3 minutes. Cover with a damp cloth for 15 minutes. Or transfer to an airtight container.

For making the Dumplings:

Take a small amount of (grape sized) dough and roll on a greased surface. add a little oil on  the board if needed, to make a thin sheet for the momo.

Add about a tablespoon of the stuffing and seal as shown or any shape you prefer.


For Steaming the momos:

Fill the bottom pot of the steamer with about half or little less with tap water.

Boil the water in a steamer. While the water is boiling, grease the steamer liberally with oil, so that the momos do not stick at the bottom.

After greasing the steamer, place the momos on it with about half an inch distance between each dumpling.

Once the water comes to a roaring boil, keep the steamer on the simmering water pot and cover it.

Cook for 10-15  mins or until the momos are completely cooked.

Once they are cooked, they will look slightly translucent. Let them rest for 2-3 mins in the covered steamer.


Serve it hot with the spicy dip.

Hot n Spicy Momos Dip


When I started preping for the dip, I din't know that the dried red chillies which were in my pantry are super sharp in taste. So liberally took 5-6 long chillies and soaked them in warm water and waited till they get soft to purée. Once they were soft I took the chillies along with the water and put them in the blender along with the rest of the ingredients. And once I tasted this, I literally had smoke fuming out of my ears..Now what, I started thinking??? So I added few more tomatoes , sugar, tamarind pulp to cut the spice and vinegar to bring in a little sourness. And I cooked it for about 5 minutes so that I can refrigerate this. So finally I made a big jar of this sort of schezwan sauce. I have refrigerated this and use it in a lot of Chinese recipes and Mexican as well. Its an amazing sauce and you can increase or decrease the quantity as per your taste. So a few ingredients are optional. So it would be a good idea to soak just a couple of dries red chillies first and then take extra if you feel the dip is less spicy.

Since momos are meant to be bland, it is good to accompany it with a spicy dip to relish these hot steamed dumplings.

Ingredients


  • Tomatoes- 4-5 
  • Dried Red chillies - 2-3 (soaked) 
  • Garlic - 3 cloves
  • Salt- to taste
  • Sugar- 1 Tsp
  • Tamarind pulp (optional)
  • Vinegar- 2 Tbsp (optional)

Method

Soak the red chillies in warm water until they turn soft.

Take a mixer grinder, add tomatoes, red chillies (do not add the water), garlic,sugar, salt, tamrind pulp, vinegar and blend this well. Check if the taste is okay for you or else adjust the spice accordingly.

You do not need to cook this sauce. It is an instant dip.


A Few Tips


  • You can use capsicum, onions, paneer any other vegetables. Traditionally the ingredients I have used, is what the vendors use. 
  • I prepared the dough and kept it in an airtight container on the kitchen counter and used it after about 4 hours. It was easily pliable and firm too.
  • Try and keep the shell thin, when you roll and shape them. When it steams it cooks faster and tastes better. If you roll thick shells then you might not enjoy your momos, they might be rubbery.
  • Always cover the momos once you start shaping them so that they don't dry out or develop a skin. Cover them with a damp muslin cloth.
  • You will get to know when the momos are done when they stop sticking and develop a shiny coat. And when you bite into them they are soft.
  • Tamarind pulp and vinegar is optional in the dip. You do not have to use them.


Do try these and leave me a comment!

Saturday 29 August 2015

Eggless Almonds Banana Chocolate-Chip Muffins / Eggless ABC Muffins


These days its raining cats and dogs here in Bangalore. And every time it rains, my mind starts playing kabbadi with my stomach, in short I have a carving almost every time it rains. And sometimes you do get bored of your favourite onion pakoda's and want some warm ooey-gooey cakes. So this time I decided to give the deep fried crispy's a miss and hot baked muffins a catch. So a healthy combo of the goodness of fruit and nut in a cake was what made the rains a memorably ''sweet'' experience. And the hide n seek of the dark chocolate chips balances the banana so well, that it just doesn't seem like a fruit cake. So, lets get baking with this moist, soft, gooey , sweet, nutty,chocolatey Eggless Almonds Banana Chocolate-Chip Muffins or lets call this the easy-peasy - Eggless ABC Muffins


Ingredients


  • Banana – 1 (fully ripened)
  • Milk – 1/2 Cup
  • Vinegar – 1 Tsp
  • Plain Flour / Maida – 1 Cup
  • Sugar – 3/4 Cup
  • Baking Soda – 1/2  Tsp
  • Oil – 1/3 Cup
  • Vanilla Essense - 1 Tsp
  • Chocolate Chips – 1/4 Cup
  • Almonds - 1/2 Cup, chopped (Frozen)


Method

Preheat the oven at 200 C for 10 minutes.

For the batter, start by mixing vinegar in the milk, give it a good whisk and keep this aside (this is the buttermilk we use in baking).

Mash a banana using a fork, then measure it. We require  half a cup of mashed banana.

In a mixing bowl, add in flour, fine/castor sugar, baking soda and mix it.

Add the mashed banana, vanilla essence and oil to the buttermilk (milk+vinegar) mixture and mix it well.

Dust the chocolate chips with flour, so that they don't sink to the bottom of the muffin tray.

To the dry ingredients mix, add in the chocolate chips and fold lightly and do not over mix it.

Then pour in the wet ingredients and mix it slowly and gently until everything is well combined.

Pour the batter in the Muffin tray/liners 3/4th the way .

Top with frozen almonds and  bake for 20-30 minutes. Check at 20 minutes with a toothpick, if its comes out clean, muffins are ready, if not, bake for a couple of more minutes .

Enjoy this warm, it tastes heavenly!


A Few Tips:


  • Do not use regular homemade buttermilk(chaas) , as this is not the buttermilk we use in baking. In baking buttermilk means a mix of vinegar and room temperature milk mixed and kept aside, untouched for about 7-10 mins.
  • Banana's are also used as an egg substitute, but it is only used in recipes which mostly include banana, as it has a strong flavour and fragrance which can be intimidating. 
  • Also note, that the banana must be ripe for best results. 
  • If you have too many banana's at home and they are turning brown, just put them in a zip-lock bag and deep freeze them and when ever you want to use them just let it thaw(come to room temperature) and use it for your muffins, milkshakes, ice creams etc.
  • Chocolate chips can sink in the batter and settle at the bottom of the tin, so it is advisable to roll them well in plain flour and then use them. Or you may add them in intervals while you pour the batter.
  • We do not use toasted almonds, as, while baking in high temperature, they might burn and taste bitter and of course spoil the muffins overall taste. We use frozen nuts as they toast in the heat produced by the oven.
  • Always stock your dried fruits in the fridge, they never get spoilt.


Do try this and leave me a comment!

Saturday 22 August 2015

Flour Butter Cream Icing


 Butter cream is usually extremely sweet. The bakery cakes which we eat, often uses this sweet cream, of-course with margarine, which isn't healthy (and to cut costs)..... That's when I started surfing the internet baba for eggless butter cream recipes.

There are different kinds of BC-IMBC, SMBC, ABC etc. Hence stumbled upon a few. And I liked this one and few alterations made to suit my taste-buds.

For my eggless vanilla cupcakes (recipe click here) I made this Floury Butter Cream icing. First when I started reading...I could only think of white sauce pasta because of the flour and milk procedure hahaha. And was going crazy thinking of pasta and butter cream..How will the taste be? Creamy? Floury? Too sweet?

This buttercream is creamy,light, fluffy and delicious. It is made by first cooking a simple pudding made with milk, sugar and flour. Once this pudding base has cooled to room temperature, you add it to beaten vanilla-butter by the spoonful.
And the result? A light and creamy buttercream with a pale ivory color. Although, this buttercream is hardly any different to the  Classic American Buttercream, just for the flour and is a little less sweet and more subtle in flavor.

I am doing a step wise picture tutorial for better understanding. Hope this helps as well.


Ingredients

  • Milk-1 Cup
  • Flour-4 1/2 Tbsp
  • Sugar - Half Cup
  • Unsalted Butter-1 Cup, room temp
  • Vanilla Essence- 1Tsp
  • Salt- a pinch(optional)


Method

Whisk together milk and sugar in a medium saucepan until the sugar dissolves.
When you dissolve sugar into the milk, the buttercream is guaranteed to be creamy and smooth! No sugar crystals crunching between your teeth.


Whisk in the flour. Give it good whisk to eliminate lumps.


Place the saucepan over low heat and bring this to a boil, whisking continuously, cook for about 1-2 minutes. 


Remove this custard from the heat. 
By whisking the flour into the sugary milk, you minimize the risk of getting flour lumps in the pudding base. 

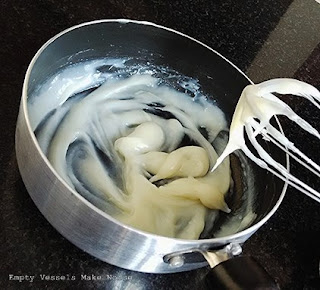
This custard should hang from the whisk but should not pour down as a stream from the whisk.


Immediately cover it with plastic wrap, pressing the plastic wrap directly against the pudding's surface, so that a crust is not formed.


In a mixing bowl with a handheld mixer, beat the butter until smooth and fluffy and lightened in colour, about 2 minutes. Add the vanilla to this and mix well.


Add the cooled pudding one tablespoon at a time, mixing well after each addition. Add a pinch of salt(completely optional) and beat until buttercream until it looks thick, smooth, and creamy (about 3 minutes). Beat the mixture until it is stiff enough to pipe and hold shape.
By beating the softened butter until it's pale and creamy and then adding this to the pudding base one spoonful at a time, the buttercream comes together very easily.


This is the just whipped and coloured Flour Butter Cream Icing.


These are different designs I could pipe.

                                                             
                                                                Vanilla Cupcakes (recipe click here)


Use immediately or refrigerate in an airtight container for up to one week. 
To use buttercream that has been refrigerated, first allow to come to room temperature then beat until smooth and spreadable again. Cakes/cupcakes decorated with this buttercream generally keep up to 3 days, stored in an airtight container in the fridge.


A few Tips:

  • You can make this buttercream allergy-friendly by using gluten-free flour instead of the all-purpose, and also lactose-free milk. No lactose, no gluten! (which is the new trend catching up in India)
  • The custard should not be too thick. If it becomes thick, make sure to pass it over a sieve to discard the lumps.
  • Salt is added to enhance the flavour of the butter cream, so just add a pinch not more. And please never use salted butter.Always use unsalted butter for icings.
  • The custard must be at room temperature while adding butter. If it is hot, then the butter will melt in the custard and your buttercream will not be creamy nor will it be able to hold stiff peaks.
  
Do try this and leave me a comment !! Would love your feedback.
And do let me know, if you like my picture tutorials and would like to see more of this.